The following step-by-step instructions take you through the changes required to port the aria_quickstart "aria_quickstart_mzef_cu_wqvga" application to Legato:
1. Open the Aria Quickstart project using MPLABX.
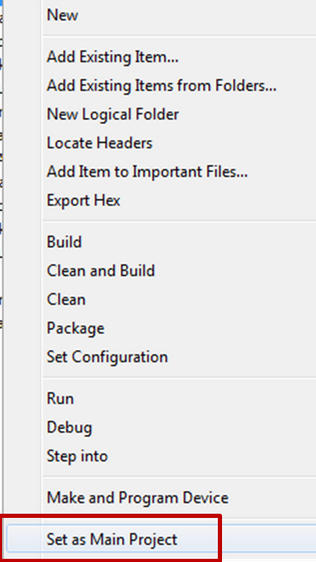
2. Set a Main Project
- Right click on a project's top node and select Set as Main Project from the popup menu.
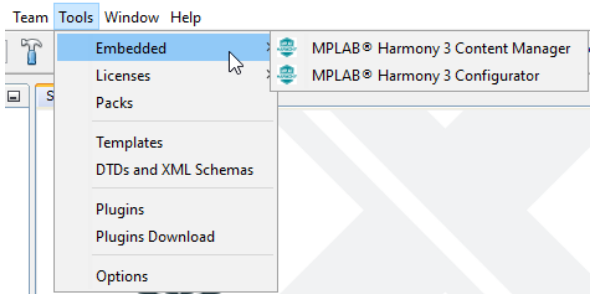
3. Launch MPLAB Harmony Configurator (MHC)
- Select Tools > Embedded to verify that MHC and the content manager are displayed in the list.
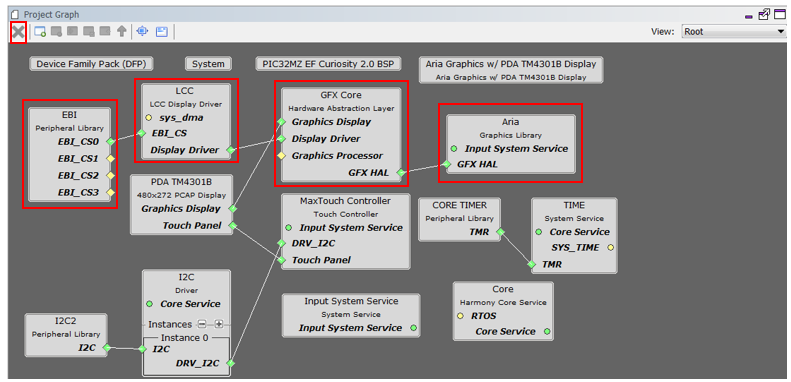
4. Remove components from the Project Graph
- Select each component and select "X"
5. Add Legato graphics library
Under the Available Components tab, expand Graphics > Middleware.
Select and double click on Legato to add the Legato graphics library to the project.
6. Add LE Display Driver
On the Legato Component, connect, LE Display Driver to LE LCC Display Driver.
Confirm Component Auto-Activation. When prompted with the message "Are you sure you want to activate these components?" GFX Core LE (gfx_hal_le), select Yes.
7. Add PDA 4.3" Graphics Display
On the LE LCC component, connect Graphics Display to PDA TM4301B.
8. Add LE Display Driver
On the LE LCC component, connect EBI_CS to EBI Peripheral Library.
9. Import existing GUI design
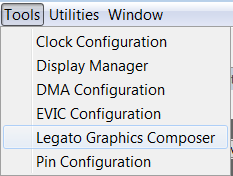
- Launch Legato Graphics Composer
- When prompted to "Create a new project" or "load an existing", select Close.
- Using Legato composer , select File -> Import.
- Navigate to the src/config folder and then select harmony.prj.
10. Generate Code
- When done, before generating code, click Save MHC State as shown below.
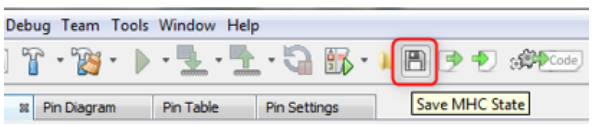
- Click on the Code Generate button as shown below to start generating code.

11. Examine the generated code for Legato as shown below.
- You will note that Aria, Library, Aria HAL abstration, LCC Driver has been replaced with Legato Library and gfx_driver driver interface.
12. Navigate to the Projects tab to view the project tree structure
13. Build the code by clicking on the Clean and Build icon ![]() and verify that the project builds successfully.
and verify that the project builds successfully.
At this point, you are ready to start implementing your application code.
14. Build, program, and observe graphics user interface
- The Curiosity PIC32MZ EF 2.0 Development Board allows the Embedded Debugger (EDBG) to be used for debugging. Connect the Type-A male to micro-B USB cable to the micro-B DEBUG USB port to power and debug the Curiosity PIC32MZ EF 2.0 Development Board.
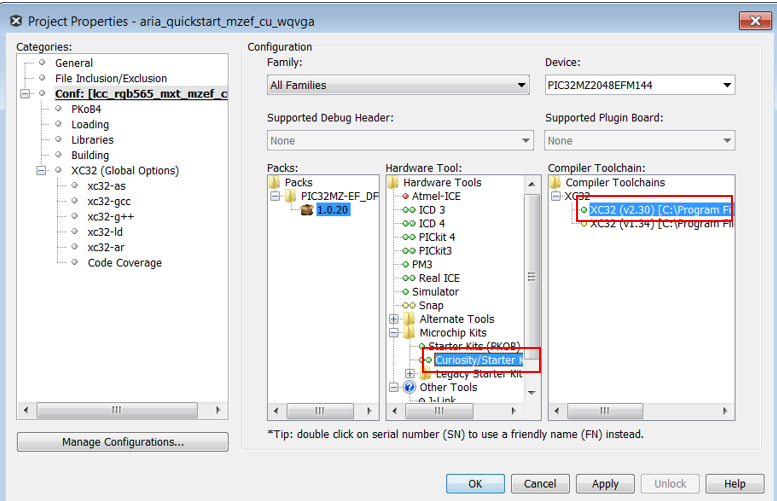
- Go to File > Project Properties and make sure that the Curiosity MPLAB (PKoB 4) is selected as the debugger under the Hardware Tools and XC32 (v2.30) or greator is selected as the Compiler Toolchain for XC32.
- Clean and build your application by clicking on the Clean and Build button as shown below.

- Program your application to the device by clicking on the Make and Program button as shown below.

The application should build and program successfully.
15. Verify GUI design on display and button press
- Press the switch Button on the display to
|
MPLAB® Harmony Graphics Suite
|