Small buttons are hard to activate on the screen. The use of phantom (invisible) buttons can improve touch performance without increasing the size of the visible footprint of the button on the display.
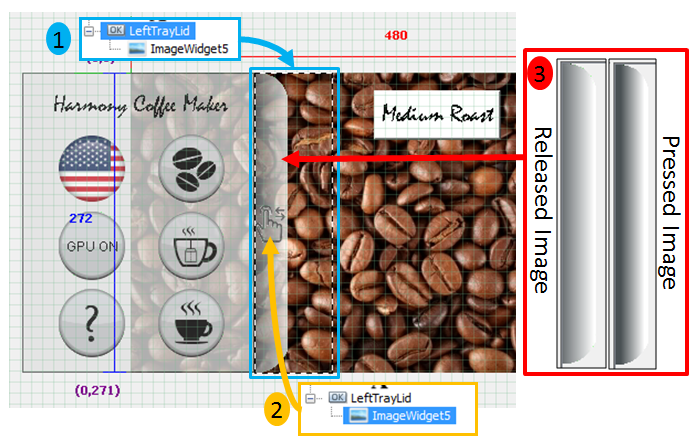
The aria_coffee_maker has a sliding tray on each side of the display. Sliding a tray in, or out, is accomplished by a phantom (invisible) button. Looking at the left tray, we see the three parts of this phantom button.
- LeftTrayLid: An invisible button widget, whose outline is shown in blue. This area is the touch field.
- ImageWidget5: An image widget containing a hand icon, providing a visual clue as to how to manipulate the tray.
- The Release Image and Pressed Image: These are defined as part of the button widget properties. The Pressed Image has a darker coloring than the Released Image. This difference is what shows the user that the button has been pressed.
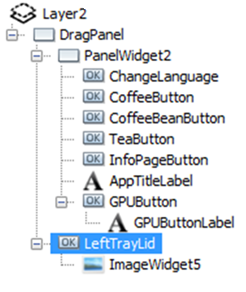
The drawing hierarchy for this part of the design is shows that ImageWidget5 is a daughter widget to the LeftTrayLid button widget.
Examining the properties of the LeftTrayLid button widget reveals more about how this works. The following figure demonstrates these three properties.
1. The Border is defined as None.
2. Background Type is defined as None.
3. The different images used will show when the button is Pressed or Released.

By setting the border and background to None, the button is invisible. Only by providing different images for Released versus Pressed does the user know when the button has been pressed.
The actual touch region defined by the button is much larger than the images shown on the display. This extra area increases the touch response of the display.
|
MPLAB® Harmony Graphics Suite
|