The Image Assets window is launched from the Graphics Composer’s Asset menu.
The Image Assets window supports import images, select different image formats/color modes for each image, select compression methods (for example, RLE) for each image, and displays the memory footprint of each. Images can be imported as a BMP, GIF, JPEG, and PNG (but not TIFF). Images can be stored as Raw (BMP, GIF), JPEG, and PNG.
 Note: Note: |
MHGC does not support image motion that can be found in GIF (.gif) files. GIF images are stored in the raw image format, meaning that there is no image header information stored with the image. |
When an image is imported into MGHC, the Graphics Asset Converter (GAC) stores the input format and color mode along with any relevant header data. The image’s pixel data is then promoted from its native format into a Java Image using 32 bits/pixel (8 bits for each color, RGB, and 8 bits for Alpha Blending). If the image contains Alpha Blending then this information is stored in the “A” of RGBA, otherwise the “A” is set to maximum opacity. When the application is built each image is stored in the image format and color mode selected. Images displayed in the Screen Designer are converted from Java Image format into the format/color mode selected so that the Screen Designer accurately represents what the application will show when running.
The images are decoded on the fly by the graphics library and rendered on the screen. This provides the designer with considerable flexibility to import using one format and store resources using another format, thus exploring and maximizing the best memory utilization for their application and hardware. This supports trading a smaller memory footprint at the cost of additional processing (for static or drawn-once) or reducing processing at the cost of a larger memory footprint (dynamic or drawn many times).
The following figure shows the Image Assets window for the Aria Quickstart demonstration.
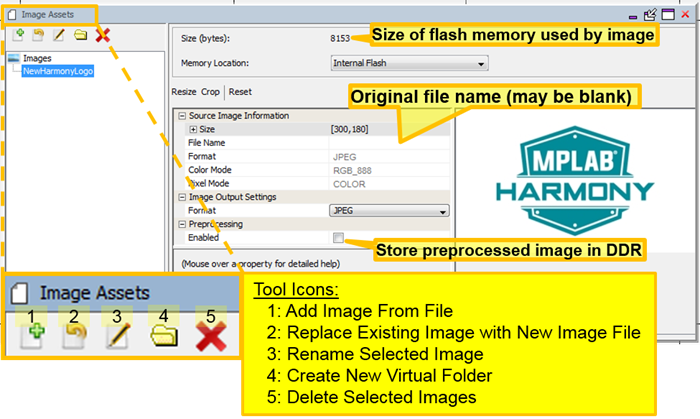
There are five icons on the toolbar below the Images tab:
- Add Image Asset – Brings up “Import Image File” dialog window to select image file to add to the graphics application.
- Replace Existing Image with New Image File – Brings up the same “Import Image File” dialog but instead of creating a new image, the file’s content replaces the currently selected image.
- Rename Selected Image – Renames the selected image.
- Create New Virtual Folder – Creates a new virtual folder, organizes images in a hierarchy.
- Delete Selected Images – removes the selected images from the application.
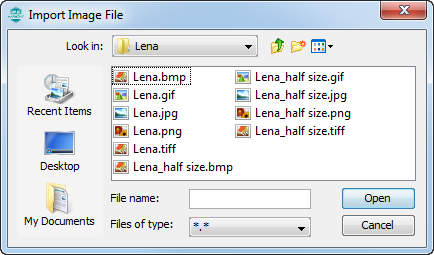
Selecting the Add Image Asset or Replace Existing Image icon opens the Import Image File dialog that can be used to select and import an image.
After selecting the file and clicking Open, the Image Assets window opens.
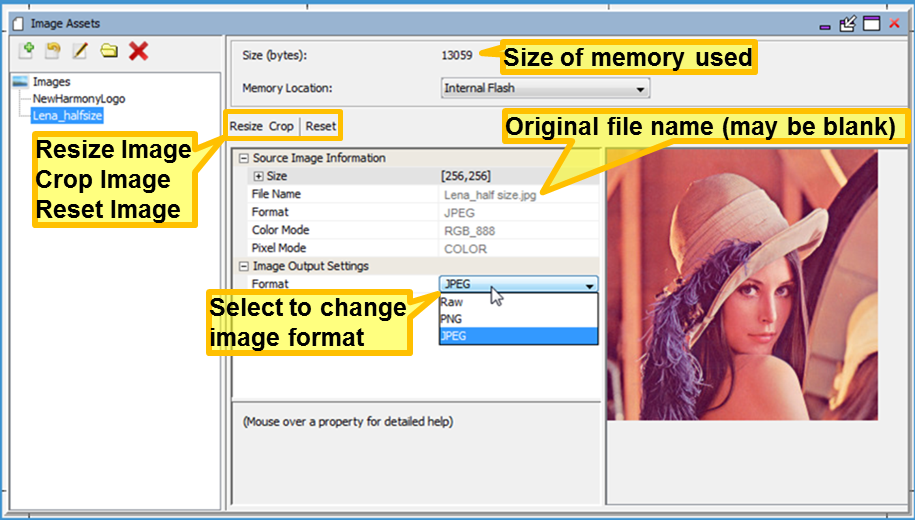
The size of the memory used for this image based on its color mode, format, compression, and global palette usage is shown by Size (bytes). See Image Format Options below for more details.
The File Name of the original source file is also shown, but may be blank if the image was imported under MPLAB Harmony v2.03b or earlier. The format and color mode of the stored image can be changed to reduce the image’s memory footprint. (If using an LCC controller, you can also turn on the Global Palette, replacing each pixel in the image with just an 8 bit LUT index.)
The three internal image formats are:
- Raw – binary bit map with no associated header information. GIF and BMP images are imported into this format.
- PNG – lossless image format with compression, 24 bits/pixel (RBG_888) or 32bits/pixel (RGBA_8888). A good choice for line drawings, text, and icons.
- JPEG (JPG) – loss compressed format, uses much less storage than the equivalent bit map (raw). Good for photos and realistic images.
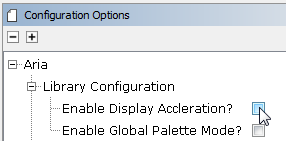
New to Harmony 2.06 is the option to preprocess an image into raw pixels at boot-up, which will greatly improve image draw/redraw times though the use of the high performance 2-D graphics processing unit (GPU) that is available on DDR-enabled DA devices. Be sure that this feature is enabled in MPLAB Harmony Configurator. Install a graphics hardware accelerator in MHC's Project Graph. For the GFX Core component, do a right mouse click on the Graphics Processor component and then select among the available Graphics Processors. Select the "Nano2D" processor from the Satisfiers list:
Next, click on the Aria Graphics Library component and in its Configuration Panel enable display acceleration:
|
Note: |
Do not enable image preprocessing except on DDR-enabled DA devices with the 2D GPU graphics processor enabled (which uses the Nano 2D Driver). To do so will produce an application that builds but does not run. |
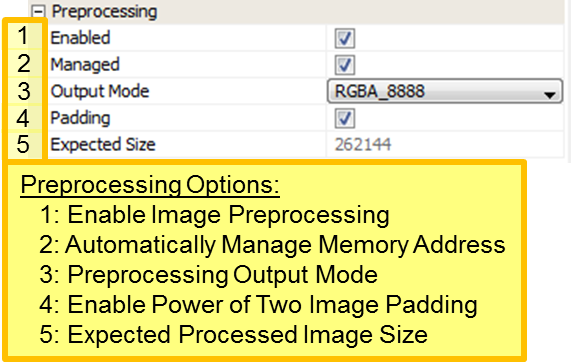
With Preprocessing of the image enabled, additional options become available:
- DDR Memory allocation for the image is automatically handled when the Managed option is selected
- The Output Mode should be selected to match the GLCD’s color mode, typically RGBA_8888
- The Padding option expands the image size to the nearest power of two. For example, a 480x212 image would be increased to 512x256 pixels.
- The expected size of the preprocessed image in DDR memory is shown in the Expected Size entry
For more information on how images are stored within DDR memory, see the section on the Asset Management DDR Memory tool above.
The Image Assets window supports resizing, cropping, or resetting an image:
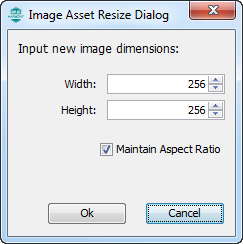
- Resize – Brings up a dialog window to change the pixel dimensions of the image. The image is interpolated from the original pixel array into the new pixel array.
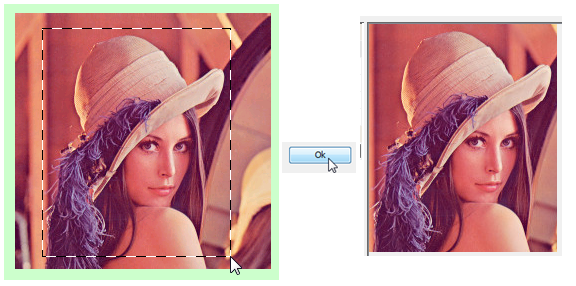
- Crop – Places a cropping rectangle on the image. Click and drag a rectangle across the image to select the new image. Then click Ok to crop the image.
- Reset – Allows undoing of a resize or crop. The original image is always stored in the project, so a Reset is always available to return the image to its original state.
Original images are retained by MHGC by the superset Java Image format. So an image crop will change how the image is stored in the application but not how it is stored in MHGC. Reset will always restore the image back to the original pixels. (Reset is not an “undo”.)
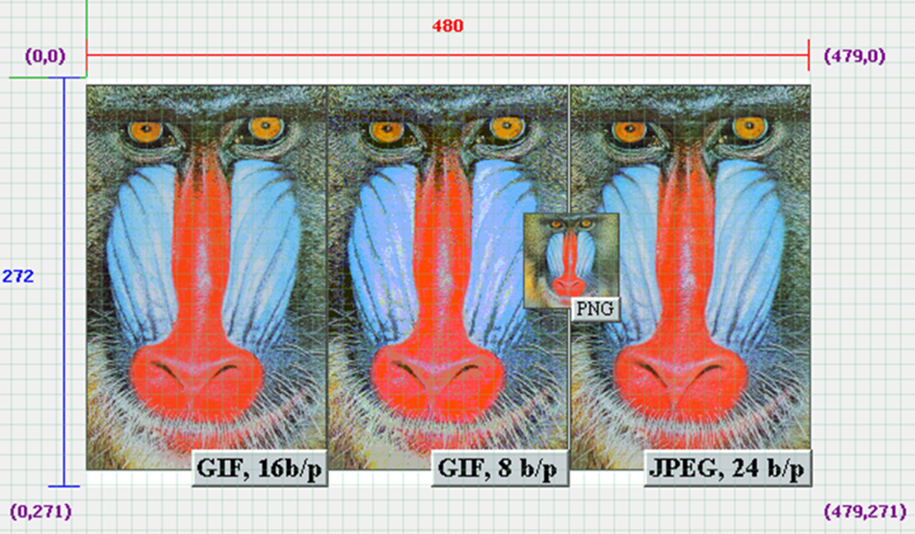
Example images are available from many sites on the internet. One of the best sites is found at the USC-SIPI Image Database ( http://sipi.usc.edu/database/). There are many canonical test images, such as Lena, The Mandrill (Baboon), and other favorites, all in the TIFF format. The TIFF format is not supported by the Graphics Composer, but it can be easily convert from TIFF to BMP, GIF, JPEG, or PNG using the export feature found in the GNU Image Manipulation Program (GIMP), which is available for free download at: https://www.gimp.org. GIMP also allows the user to change the pixel size of these images, usually 512x512, to something that will fit on the MEB II display (either 256x256 or smaller).
The following figure shows the Graphics Composer Screen Designer for the pic32mz_da_sk_meb2 configuration of the Aria Quick Start project after adding three images.
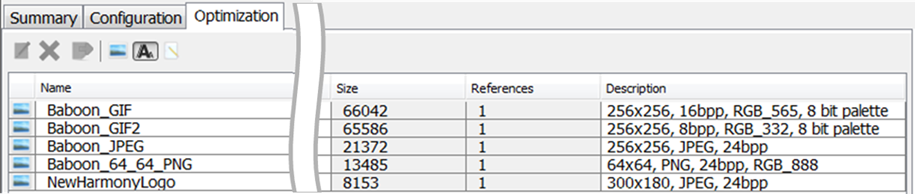
The following figure shows the Optimization Tab after adding these images.
Selecting the Baboon_GIF image and the Edit Selected Asset icon (  ) opens an Image Assets window, as shown in the following figure.
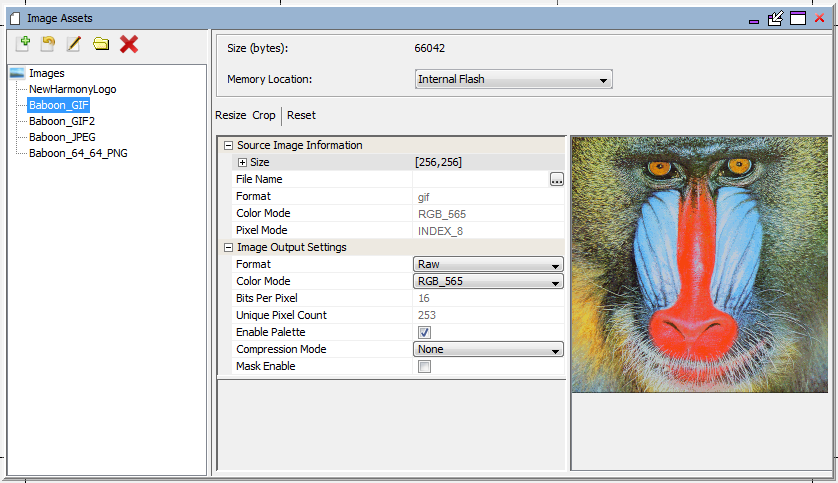
Because this image had only 253 unique pixel colors (Unique Pixel Count = 253) the Enable Palette option was automatically enabled. This feature, which works on an image by image basis, is separate from enabling a Global Palette. The image is stored using 8 bits of indexing into an image-specific lookup table (LUT). If the image has more than 256 unique colors then the Enable Palette option is not available and is not shown.
Raw Format Images
Raw format images have the following options:
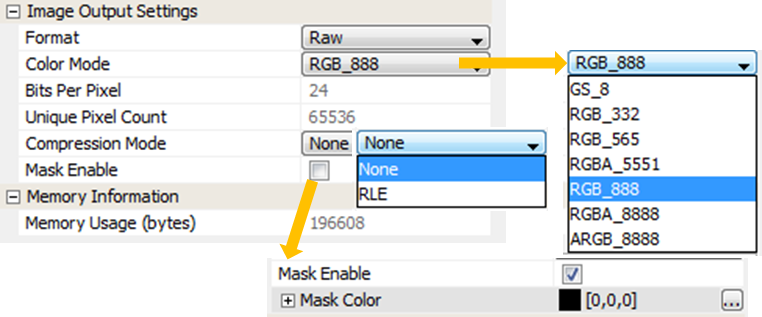
Regardless of the Color Mode of the imported the image, the stored image can be stored in a different color mode. For example, a JPEG image could be in 24 bits/pixel RGB format but stored in the application using RGB_565 or even RBG_332 to save space. The Project Color Mode (set through the File > Settings menu) is different from the Color Mode of images. This is determined by the capabilities of the projects graphics controller. The graphics library converts images from the stored color mode to the project’s color mode before output.
If the image has 256 or less unique pixel colors an option to Enable Palette is set by default. If the image has more than 256 unique colors this option is not displayed. This replaces the palette pixels with 8-bit indices into the image’s palette look up table (LUT). NOTE: Enabling the Global Palette disables this for all images and all image pixels are replaced by 8-bit indices into the global palette LUT.
The Compression Mode for a raw format image is either None (no compression) or RLE for run-length encoding.
Image masking is a form of cheap blending. For example, given the following image, you may want to show the image without having to match the lime green background. With image masking the user can specify that the lime green color as the “mask color”, causing it to be ignored when drawing this image. The rasterizer will simply match a pixel to be drawn with the mask. If they match, the pixel is not rendered.

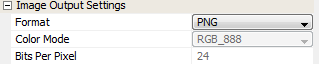
For PNG format images, the user can change the image format and the image color mode:
For JPEG format images, the user can change from JPEG format to Raw or PNG:

Once changed from JPEG into another format, the new format will have other options.
The Image assets tool lists the images in the order of their creation. In a future version of MPLAB Harmony this will be sortable by image name. For now, it is recommended that the user use the Memory Locations asset tool, and use the Optimization sub-tab instead to manage a complex set of images. The Optimization sub-tab allows the user to sort graphics assets (fonts, images, binaries) by Name, Size, and number of widget References. This makes it much easier to find and edit an image by its name rather than order of creation.
|
MPLAB® Harmony Graphics Suite
|